A hotspot is a physical location where people may obtain Internet access, typically using Wi-Fi technology, via a wireless local area network (WLAN) using a router connected to an internet service provider.
Public hotspots may be created by a business for use by customers, such as coffee shops or hotels. Public hotspots are typically created from wireless access points configured to provide Internet access, controlled to some degree by the venue. In its simplest form, venues that have broadband Internet access can create public wireless access by configuring an access point (AP), in conjunction with a router and connecting the AP to the Internet connection. A single wireless router combining these functions may suffice.[1]
Private hotspots may be configured on a smartphone or tablet with a mobile network data plan to allow Internet access to other devices via Bluetooth pairing or if both the hotspot device and the device/s accessing it are connected to the same Wi-Fi network.
Here in this blog. I would like to explain the hotpot setup In Mikrotik Routerboard with Radius Authentication.
Please follow this video for Mikrotik Device basic settings
After the basic settings we start hotspot configuration,
Login to the Mikrotik Router using Winbox.

- Click on ‘Wireless’ tab, Click interfaces then Wireles.

2.Change the SSID to whatever you like.

3.Click on security profiles and select the authentication mode ‘none’.

4.Click on ‘Bridge’ , create a new bridge and name it ‘Bridge-Hotspot’.

5.Click on Ports and select ‘wlan1’ to the newly created bridge ‘Bridge-Hotspot’.
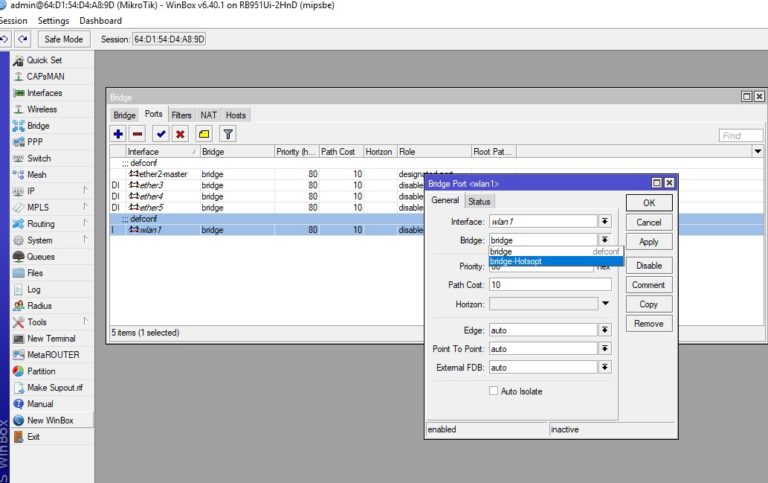
6.Click on Ports and select ‘wlan1’ to the newly created bridge ‘Bridge-Hotspot’.

7.
Click IP ->Hotspot
Click on ‘Hotspot Setup’
Select Hotspot interface as ‘Bridge-Hotspot’.
and click next

6.click Next

7.You can enter the default address pool here.

8.next select certificate- if you have valid certificate choose it or select ‘none’ .
9.IP of SMTP server- ‘none’.

10.DNS Server – ‘none’

11.
next
DNS Name.
Enter the DNS name. That name will be the display name of the Hotspot Login page.

12.
Default user for the hotspot will be ‘admin’
Enter a password for ‘admin’.

13.You will see a message. ‘setup has completed successfully’.

14.
Double click on ‘hotspot1’ and edit.
change Address per MAC from 2 to 1 for security reason. It will allow one connection per MAC.otherwise someone can spoof the MAC address and connect.

15.Click on server profiles -> click Radius-> put a tick on ‘Use Radius’.

16.
Click on ‘Login’
tick out ‘cookie’

17.Click on System->packages and make sure ‘user-manager’ package is installed.

18.
Click on ‘Radius’ and add a radius server as shown
Enter IP: 127.0.0.1
secret: 123 (use secure one, This is for demonstration only)

19.Reboot the router.

20.
Open web browser and enter ‘192.168.88.1/userman’
Mikrotik User manager page will open. Default user name is admin and there is no password.

21.
Login to User Manager.
Click on Routers and add Router.

22.Create a New Profile

23.You can add profile limitations, if you want.

24.Click on ‘Users’ and create the hotspot users.

25.
Setup is completed.
Connect to that Hotspot from a wifi enabled computer, tablet or mobile.

26.You will see a Login Page.


 Managed IT
 Backup
 IT Infrastructure
 Cloud Solutions