Nifty is the leading VMWare Solution in the UAE (Dubai Sharja Abudhabi) we have successfully completed many Virtualization solutions in VMWare and other Open-source Virtualization technology. Please feel free to contact us if you have any requirement for VMWare Solution, Virtualization, VM Backup local & Cloud , VM Replication etc.
In this blog we would like to give you an idea about Vsphere upgrade.
Procedures
VMware vSphere 6.5 has been released as general available.This post will walk through upgrading an existing vCenter Server Appliance 6.0 to 6.5!
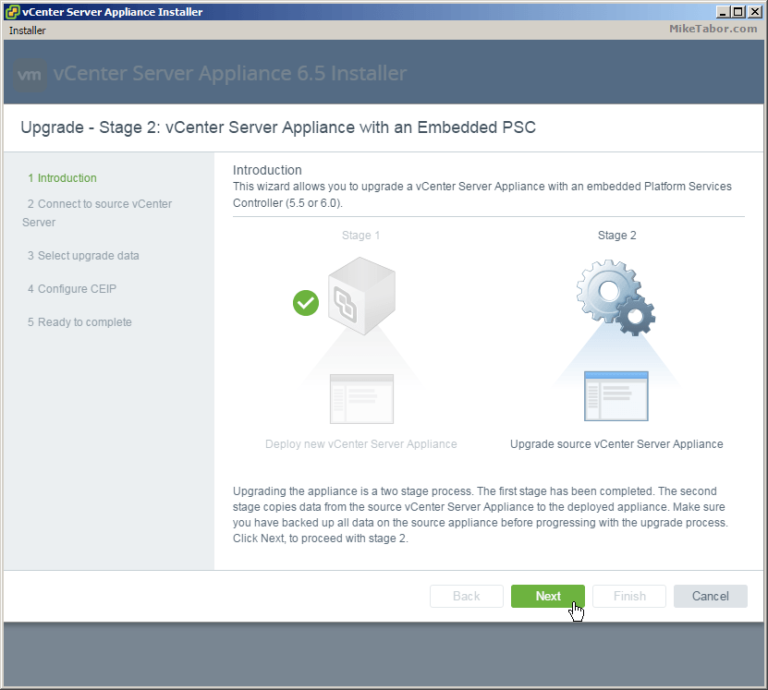
Similar to a fresh VCSA 6.5 install, the VCSA 6.5 upgrade is also broken up into two stages. The first stage is deploying a new vCenter Server Appliance and the second stage is copying data from the 6.0 VCSA to the newly deployed 6.5 VCSA.
How to upgrade vCenter Server Appliance 6.0 to 6.5
If you haven’t already, go ahead and download the VCSA 6.5 ISO and lets get started. It’s also a good idea to check the VMware Interoperability Matrix before performing any upgrade.
Notice: Upgrading from vCenter Server 6.0 U3 to 6.5 is NOT supported at this time:
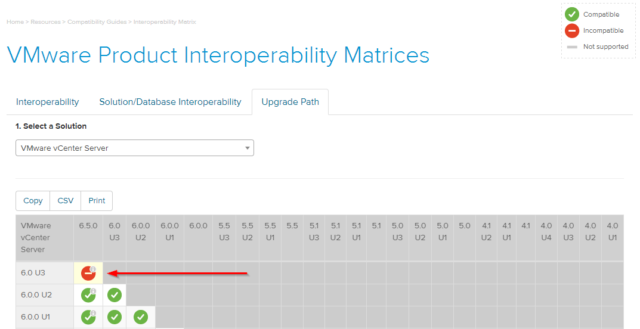
It’s always a good idea to check the VMware Interoperability Matrix before doing any upgrades.
Stage 1 – Deploying vCenter Appliance 6.5
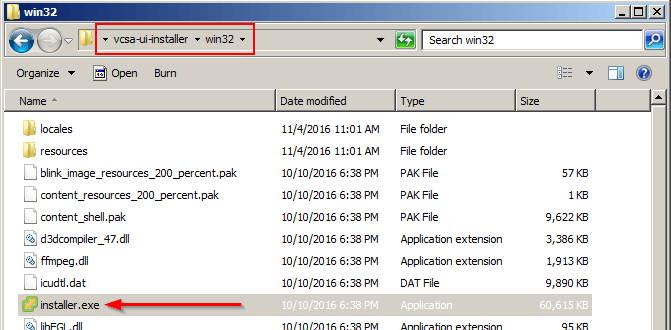
1.Mount the ISO and start the vCenter Server Appliance 6.5 installer located at \vcsa-ui-installer\win32
2.Select Upgrade from the VMware vCenter Server Appliance 6.5 Installer.
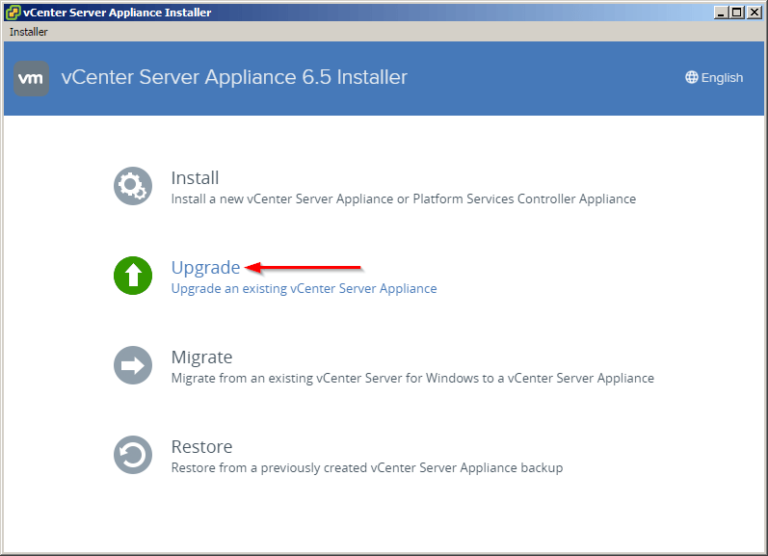
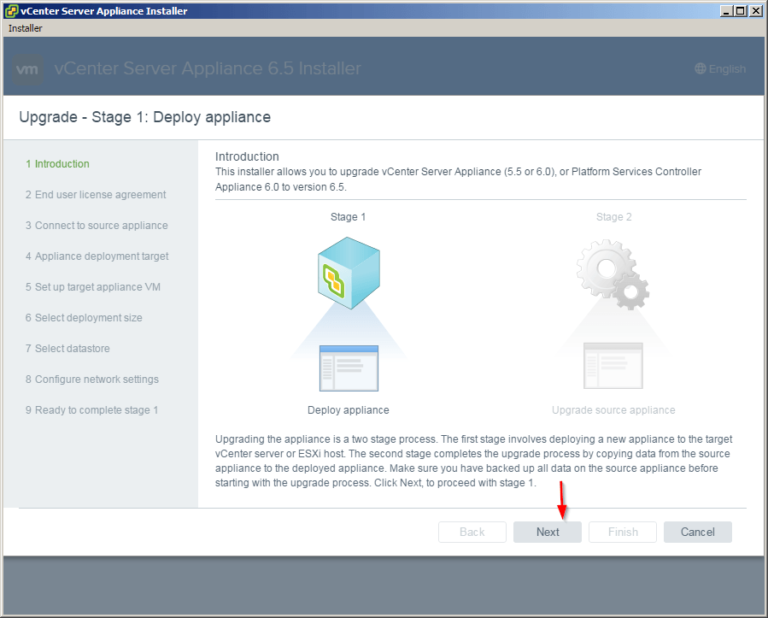
3.The introduction shows what I stated above, that the VCSA Upgrade is broken up into two stages – deploy and then copy data. Click on Next
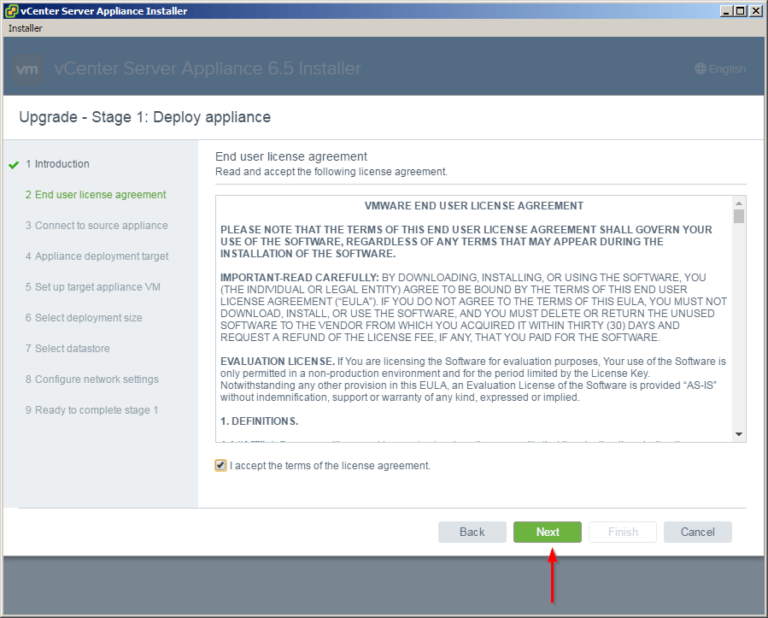
4.Accept the End User Licence Agreement.
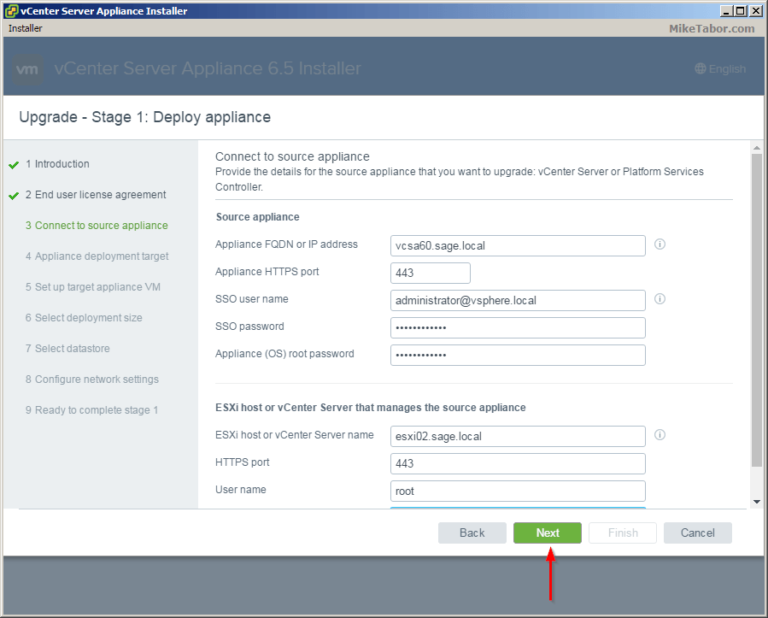
5.Enter the FQDN or IP of your existing 6.0 VCSA as well what host the existing VCSA resides on, along with all the login credentials.
6.Now enter the ESXi host you want the new VCSA 6.5 appliance to be deployed.

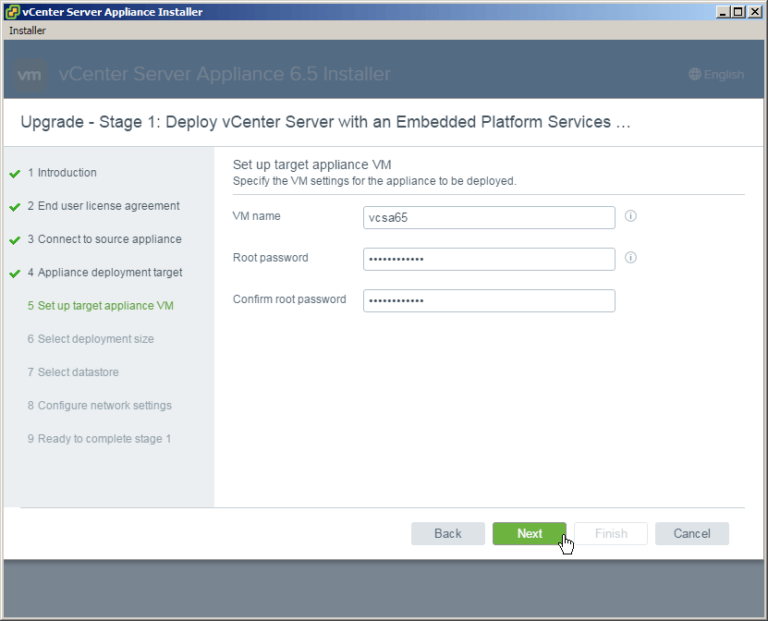
7.Enter the name you would like for the appliance VM to be called as well as set a root password.
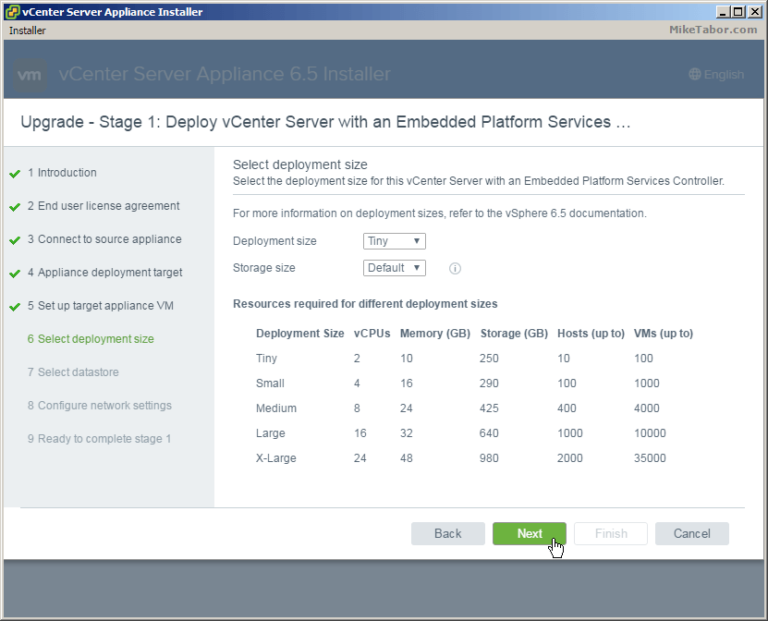
8.Next, select the deployment size that best matches your environment. For the home lab I’m selecting Tiny.
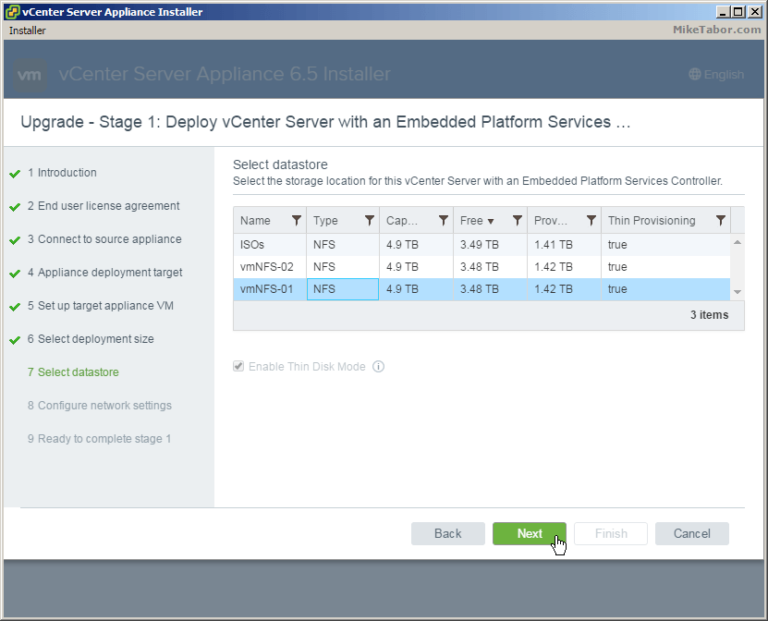
9.Select what datastore you want the VCSA 6.5 appliance to be stored.
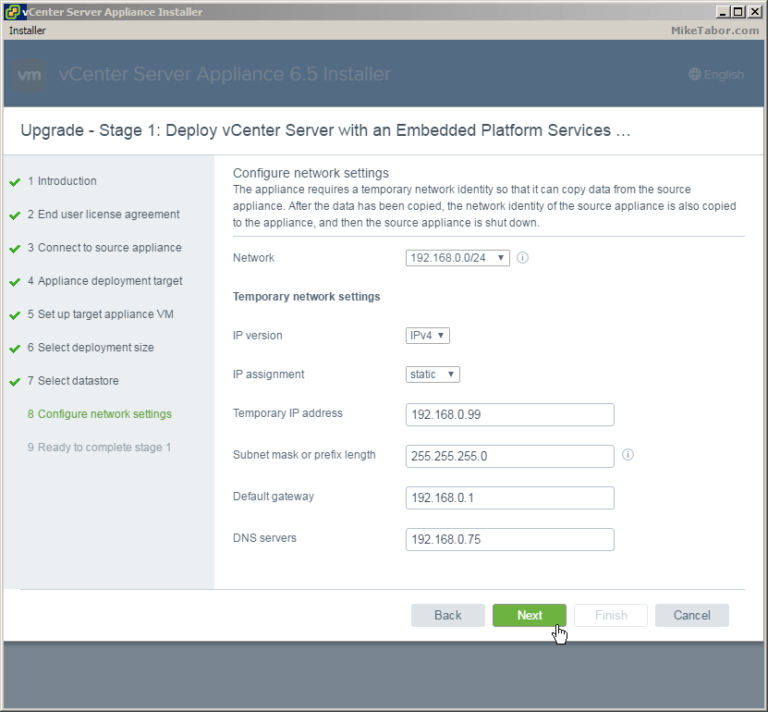
10.Configure a TEMPORARY network identity. Once Stage 2 of the upgrade has been completed the 6.5 VCSA will take the network identity of the old existing VCSA.
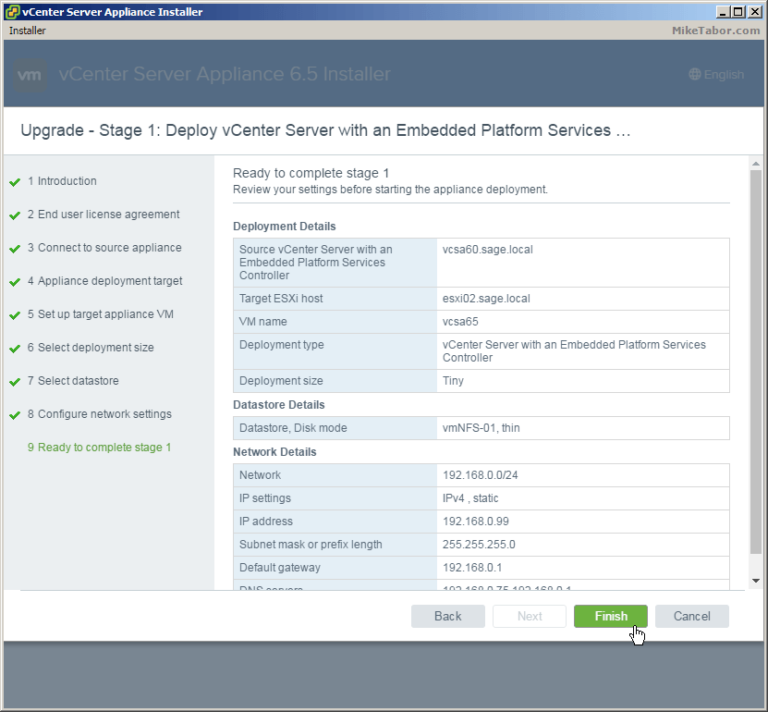
11.Review the summary and click on Finish.
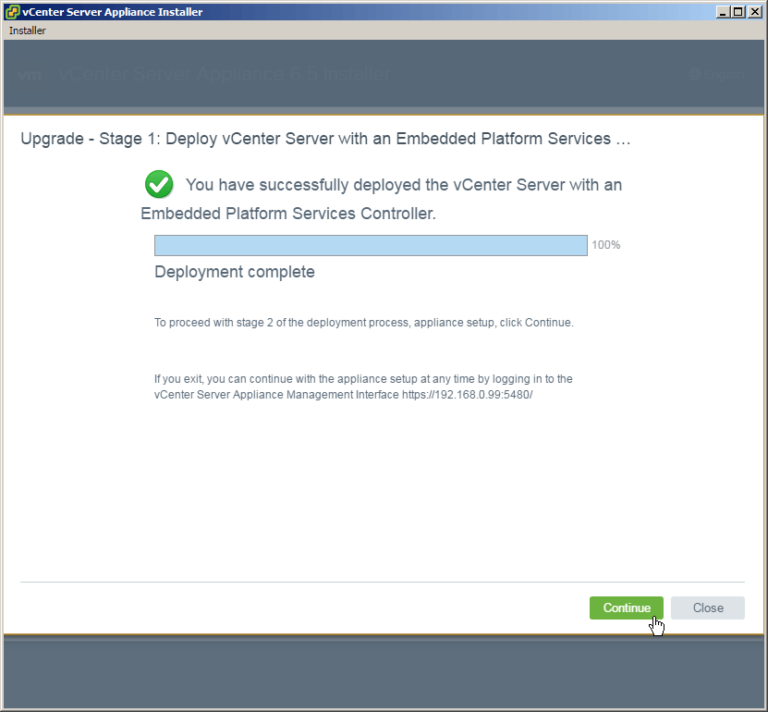
12.Once completed you will have the option to continue onto Stage 2 of the upgrade or close. If you close then you can finish the VCSA config by going to https://<TEMP_VCENTER_IP>:5480
Stage 2 – Copying data to VCSA 6.5
13.After clicking Continue from Stage 1 you will be taken to the Stage 2 Upgrade introduction page, click Next.
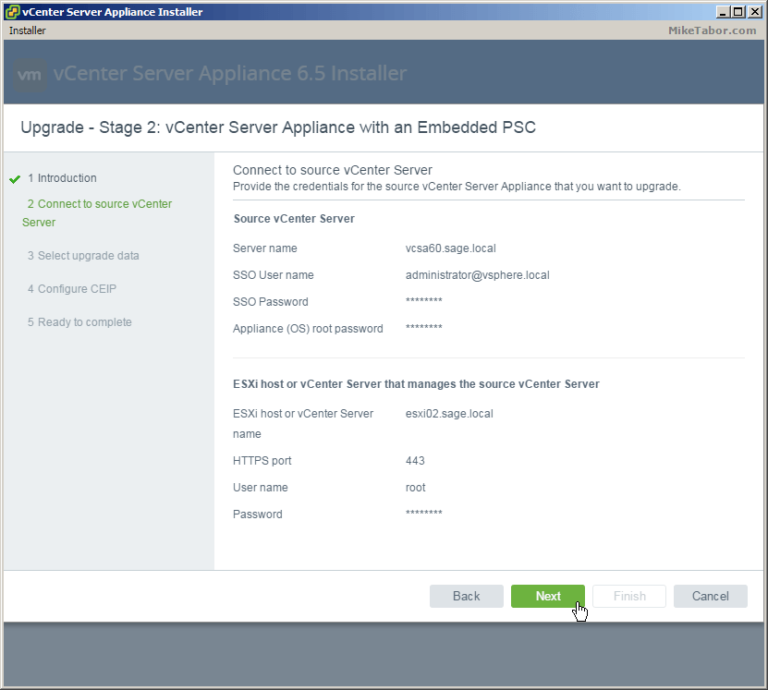
14.Confirm the source vCenter Server and ESXi host. This will be pre-populated from Stage 1 unless you closed the Upgrade after Stage 1, then you’ll need to re-supply this info. So just click on Next.
15.A pre-upgrade check will then run and show it’s results. Below you’ll see the pre-upgrade tells us we should turn off Fully Automated DRS on the cluster where vCenter Server resides.

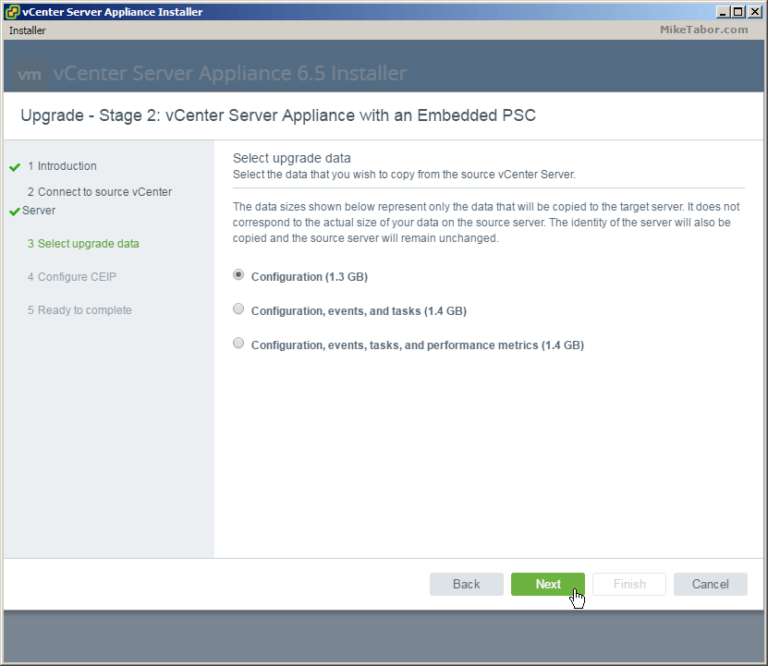
16.Select what data you would like to migrate from the existing VCSA 6.0 deployment to the new VCSA 6.5. For my home lab I’m not concerned about all the tasks or performance metrics and will only copy the Configuration data.
17.Check or un-check if you would like to join the Customer Experience Improvement Program (CEIP) and click Next.

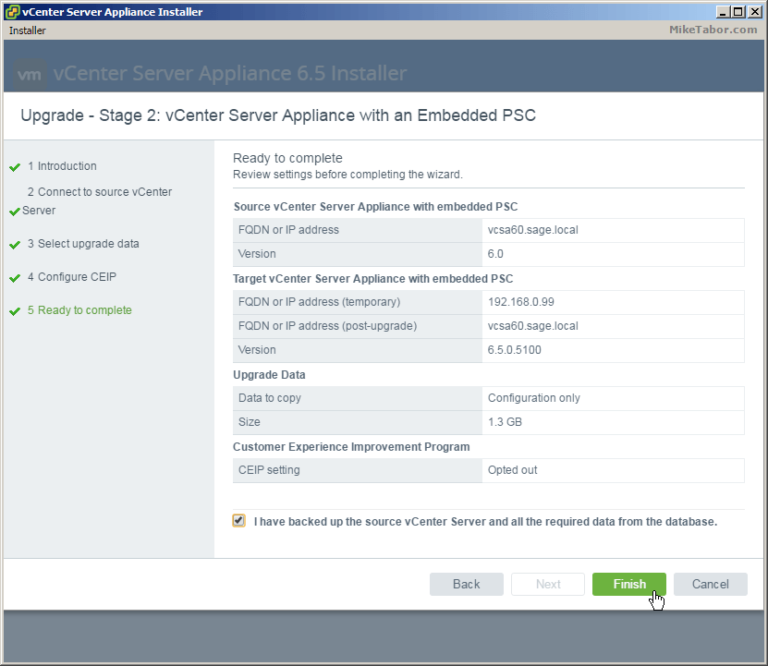
18.Again review the summary and check “I have backed up the source vCenter Server and all the required data from the database” and click Finish.
9.
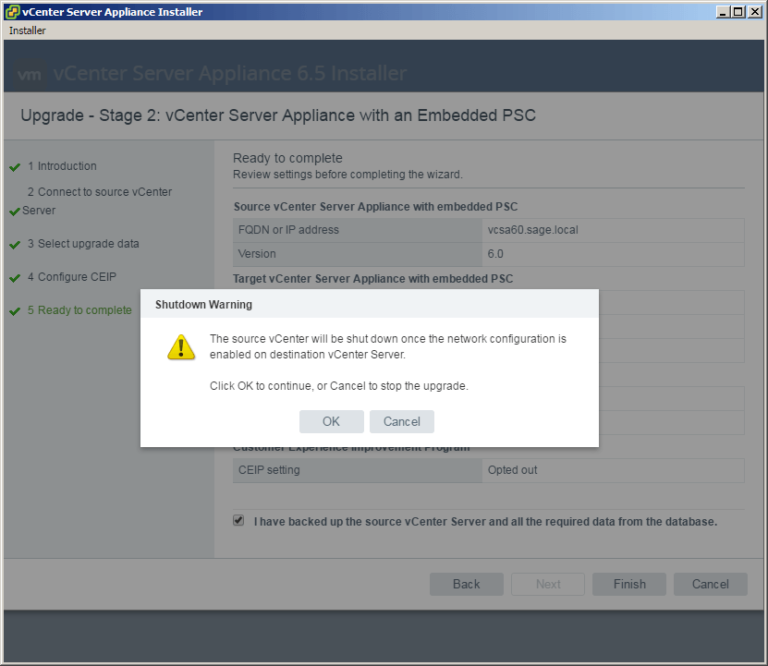
- You’ll receive a notice telling you that the existing VCSA 6.0 appliance will be shut down and it’s network identity will be enabled on the new VCSA 6.5 upgrade.
This is nice as the upgrade does NOT delete your old vCenter Server 6.0 appliance and instead just powers is off. In case something goes wrong you can power off the new vCenter Server 6.5 appliance and power up the 6.0 appliance.
Click on OK.
That’s it! If all goes well and after a few minutes the vCenter Server Appliance upgrade should complete and you should see the following screen.
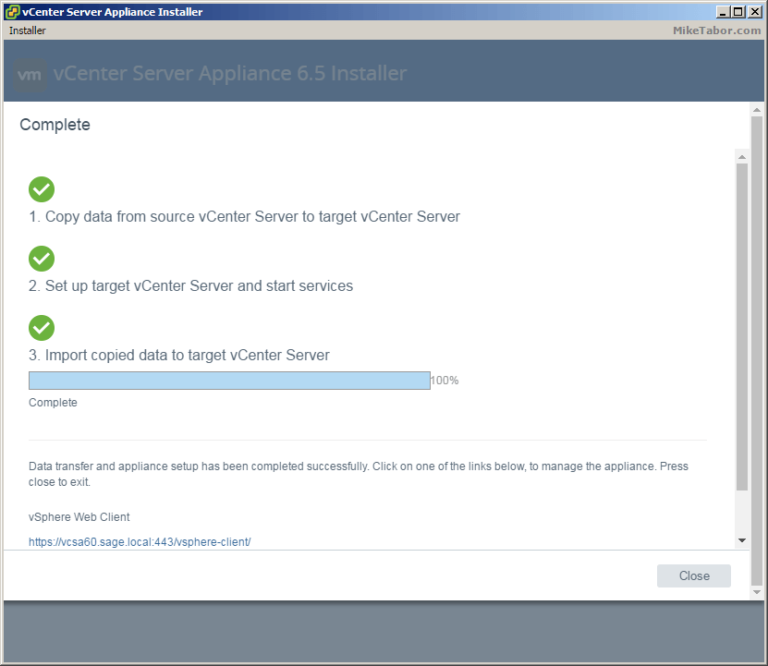
Simply log into the web client by going to: https://<VCENTER_IP>/vsphere-client and start enjoying vCenter Server 6.5!
If you would like more details about vSphere 6.5 check out the VMware vSphere 6.5 release notes here
-Abhineesh
Team Nifty


 Managed IT
 Backup
 IT Infrastructure
 Cloud Solutions